Png2PdfGUI - A graphical user interface to png2pdf
Overview
The Java application Png2PdfGUI provides a graphical user
interface to the png2pdf program.
To convert PNG files to PDF you have to perform the following tasks:
- Choose the directory containing the PNG files.
- Set conversion options.
- Run png2pdf.
- Exit the application.
These main tasks can be performed using buttons in the button bar
or using menu entries.
Requirements
To use the Png2PdfGUI you must have the png2pdf program installed.
Normally this conditions is fullfilled because Png2PdfGUI and png2pdf
are in the same package, so they are installed at the same time.
A Java run-time environment (Java 5) must be installed. Previous
versions are not sufficient to run Png2PdfGUI.
Starting the program
On Windows systems
In a prompt box run
java.exe -cp c:\programs\krause\lib\png2pdf.jar;c:\programs\krause\lib\dklibsj.jar Png2PdfGUI
You possibly need to replace c:\programs\krause by another directory, depending
on your decisions during installation process.
Once you have verified the program starts correctly you can create
shortcuts either on the desktop or in the start menu. For shortcuts you
should use javaw.exe instead of java.exe.
On Unix/Linux systems
Run
java -c /usr/local/lib/png2pdf.jar:/usr/local/lib/dklibsj.jar Png2PdfGUI
to start the program.
Program appearance at start
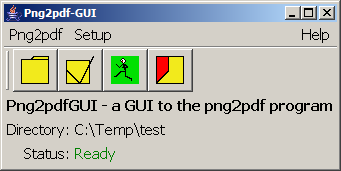
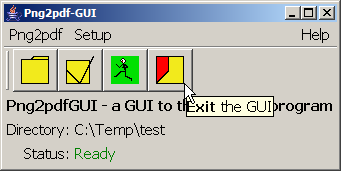
When running the program for the first time the main window looks like
this:
Choosing a directory
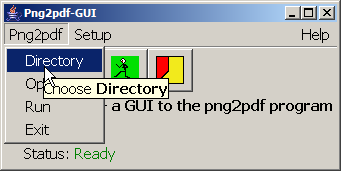
Use either the "Choose directory" button or the menu entry
"Png2pdf / Directory" to choose the directory.
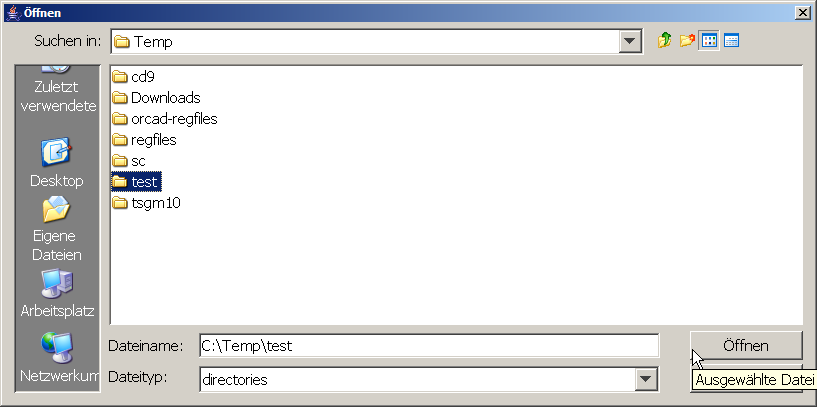
The directory chooser dialog appears.
Navigate to the directory
containing your PNG files and confirm the selection.
The new working directory is shown in the main window.
You can also attempt to use drag'n'drop to drag a directory
from Windows explorer or Nautilus into the Png2PdfGUI main window.
For other Unix/Linux desktops it is not known whether drag'n'drop works,
just try it.
Set png2pdf options
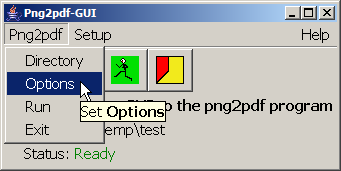
Use either the "Set options" button in the button bar or the
"Png2pdf / Options" menu entry to set conversion options.
 |
 |
 |
In the "Png2pdf Options" dialog you have the following choices:
- PDF format version
You can either produce PDF version 1.2, 1.3 or 1.4. Smaller version
numbers will be compatible to older PDF viewers, larger version
numbers require a recent viewer but provide more PDF features.
- Run in make mode
If make mode is enabled the program checks the modification timestamps
of source and destination files. A destination file is up to date
if the file exists and was last modified after the last modification
of the source file. A conversion is only run for those sources for
which there is no up-to-date destination file.
- Show file names while processing
The status message can either simply show "running" while a conversion
is running or show the file name for each file currently processed.
When processing directories containing many files showing each file name
will show you that the program is still alive.
When showing file names a new png2pdf process is started for each
conversion. If you choose to see the simple "running" status message one
process is running on the directory doing all the conversions, this
is faster than starting a new process for each file to convert.
- Image interpolation
This check box sets the image interpolation flag in output files.
Viewer programs are recommended to do image interpolation, this is
usefull if small images are scaled up.
- Alpha channel handling
Here you can decide how to handle alpha channel data if such data
is present in a PNG file.
- Input alpha channel expresses transparency
Normally you should leave this checkbox turned off because the
alpha channel expresses opacity.
- Mix against a background color
You can choose to mix foreground color (the PNG pixel RGB value) against
the background color depending on the opacity/transparency value of the
pixel. The background color is contained in the background chunk in
the PNG file.
Some PNG files containing an alpha channel do not contain a background chunk,
so it is up to the user to choose a background color. The
"Choose background color" entry allows to choose a default
background color to use if no background chunk is available in the PNG file.
Just click on the color-view rectangle to select a color.
If you always want to use the specified background color (you want to
ignore background chunks from the PNG file) enable the checkbox
"Prefer specified default color...".
- Create image mask
In addition to mixing -- or instead of mixing -- you can convert
the alpha channel into an image mask. The normal mask level is
to paint all opacity>0 pixels and to mask out all opacity=0 pixels.
Enable "Use inverted mask levels" to paint
only opacity=full pixels and to mask out all opacity<full pixels.
- Write alpha channel to output
You can also write alpha channel data to PDF output (for PDF version >= 1.4).
Note: Some of these options are not available for all PDF versions.
Some of the options are exclusive, i.e. you can not use mixing and
alpha channel writing together (the opacity factors from the alpha
channel would be applied twice: once in mixing and once by the PDF
viewer when showing the file).
Running a conversion
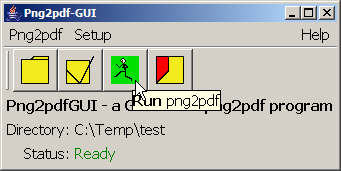
Use the "Run png2pdf" button from the button bar or the
"Png2pdf / Run" menu entry to start a conversion.
While the conversion is running the status text color changes to red
and the text changes to "Running". If you decided to see file names
the text changes to "Processing ...".
After all conversions are done the color changes back to green and the
text changes back to "Ready".
Exiting the program
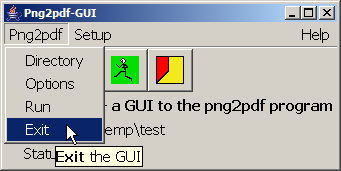
Use either the "Exit the GUI" button in the button bar or the
"Png2pdf / Exit" menu entry to exit the program.


